I”m on many screenprinter groups on social media, etc. I still see many printers spouting a wealth of misleading information. Today we discuss the test, next post will be on some direction on finding solutions.
Before you can get an answer to a problem, it is always best to define the problem. With dye migration, that means testing the fabric to see what you are dealing with.The plasiticizer costs $25 for a quart and $50 for a gallon and either one will last you close to a lifetime of testing. Scraps of white fabric are free. A heat press won’t cost you more than a few hundred dollars if you don’t already have one. This cost is of course less than the jobs all of you have already ruined by not knowing you were going to have some red shirts turn some white ink into pink ink.
Ok, you have a shirt and it has some or all polyester content, what do you do? Too many printers I see P & P it. “P & P” is what I call “print and pray” and no matter what religion you do or don’t follow, I would keep prayer out of your printing operation. You need some science and here it is. You can test the fabric and get some idea of what the appropriate measures will be to print the fabric properly.
Can’t you just ask the garment manufacturer how to print their fabric? No, usually not. They just make the garments, and most leave it to you to figure out how to print it. That is changing and two of the companies we work with, Hanes and San Mar both are working increasingly to give the printer the information they need to properly print their garments. However, most times you are flying blind in this realm and there is a great deal at stake. If you print even fifty nice red hoodies and two weeks later the red dye gets into the white ink and turns it pink and the customer returns them, that has a hefty price tag. Make that 10K hoodies and you are financially ruined…
Dye migration is when the color or some part of the color in a garment migrates into the ink you printed. There are measures you often can take to stop this process, but first you need to know if it is going to happen and if so how badly. You can do a test to see what you are dealing with and that is where we will start our series on printing on polyester.
Here is the test in words and then followed by some photos.
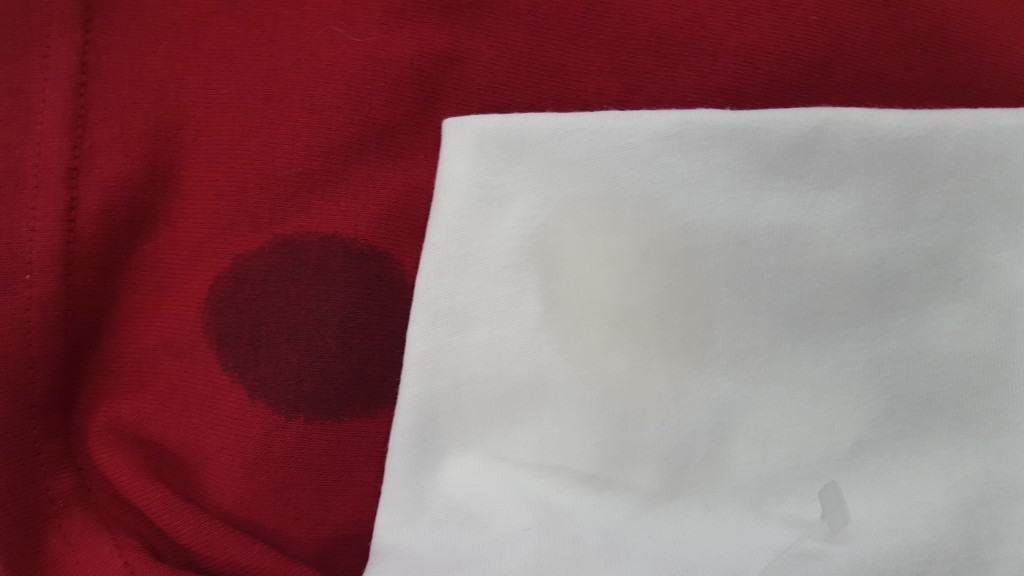
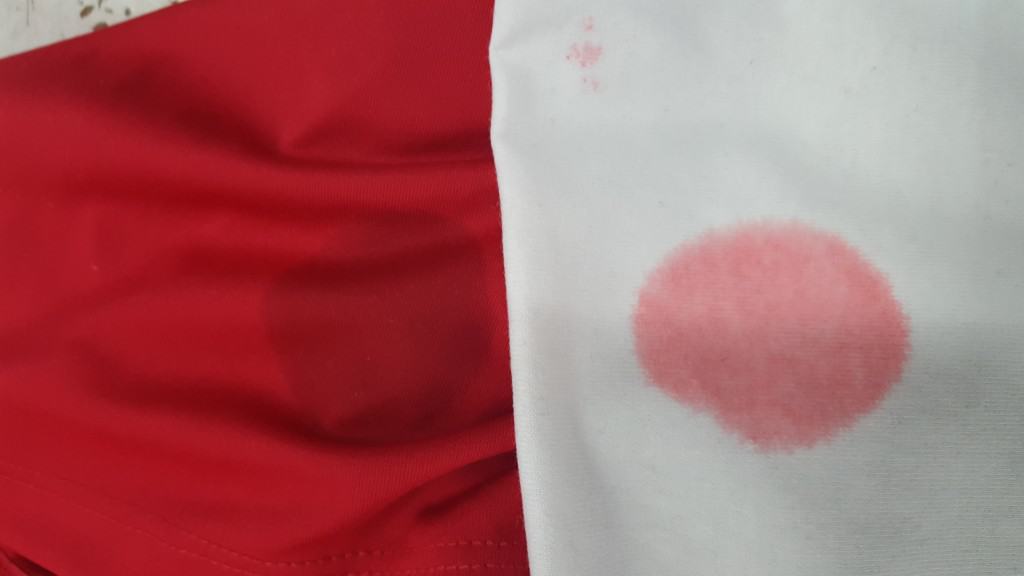
- Put the fabric you are going to test on transfer machine. Make sure the transfer machine has been turned on long enough to be fully warmed up!
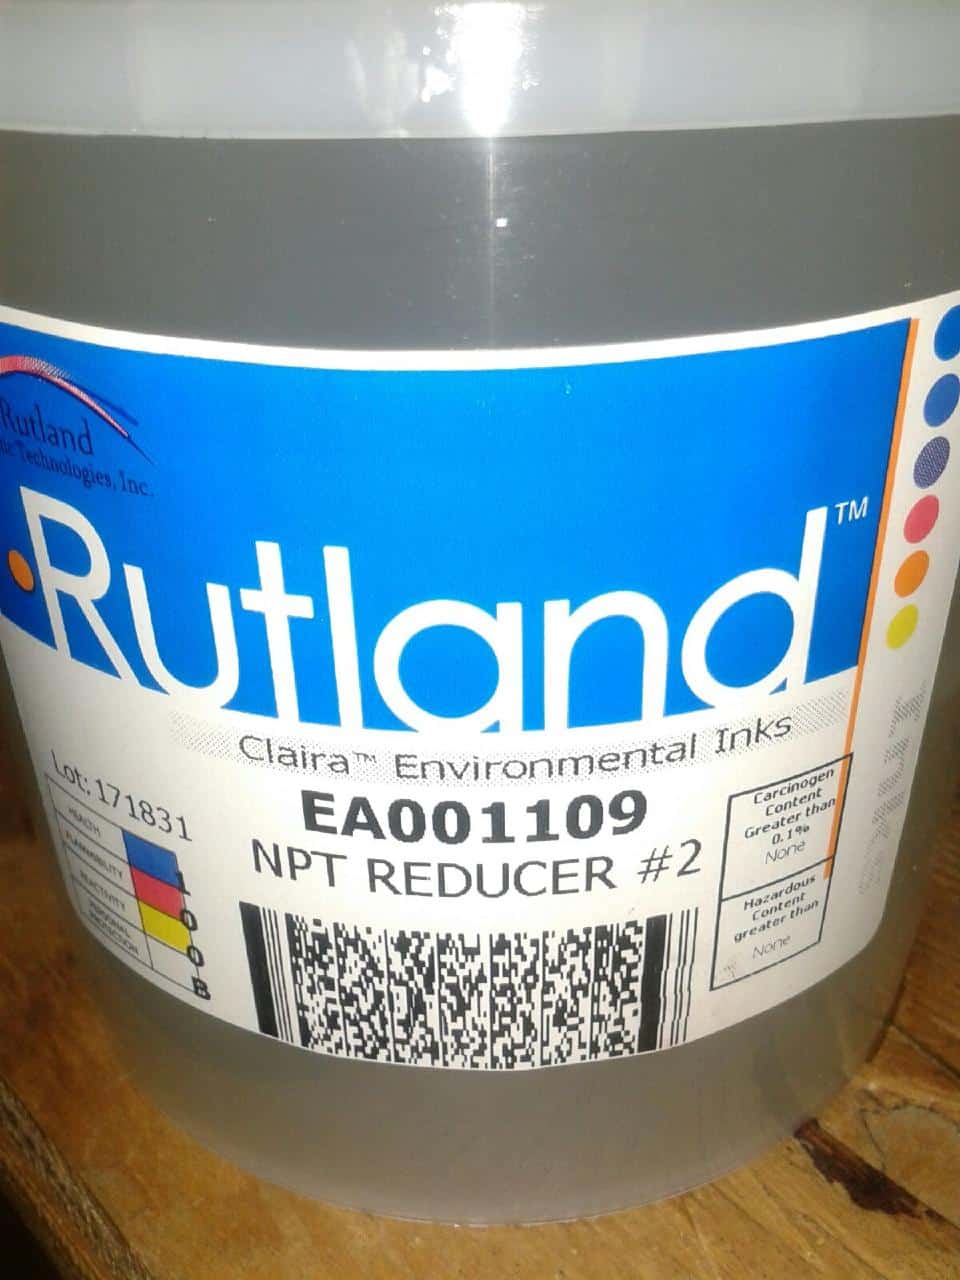
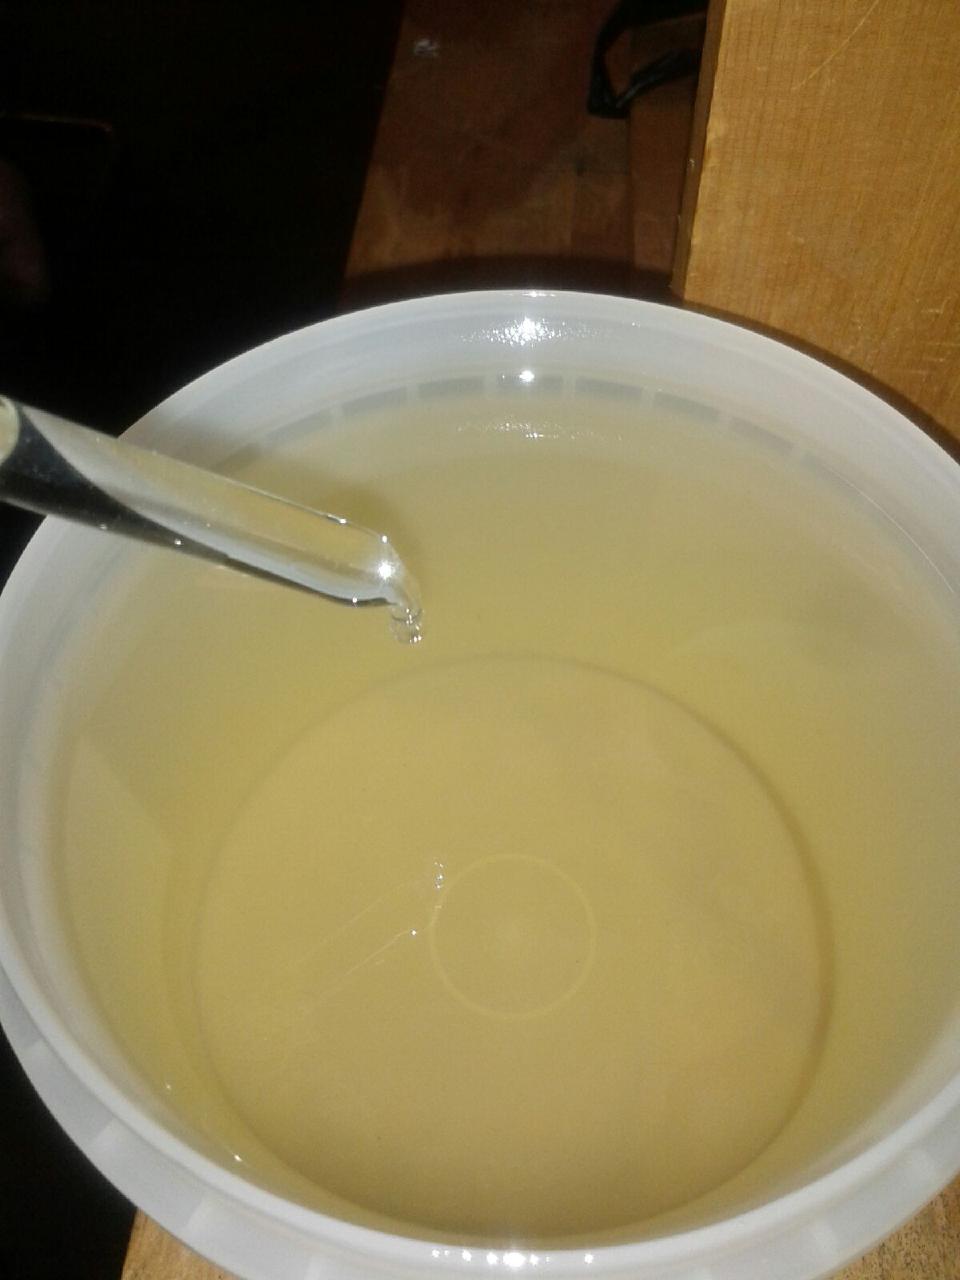
- Apply a quarter size spot of plasticizer. We use Rutland non curable viscosity reducer. They call is NPT Reducer #2 EA0011. Basically you want only half of the plastisol equation, all plasticizer, no resin. If the reducer in whatever brand you use calls for no more than adding 1%, that’s usually the right stuff. The reducers that can be added up to 10% are usually curable reducers, they are NOT what you want.
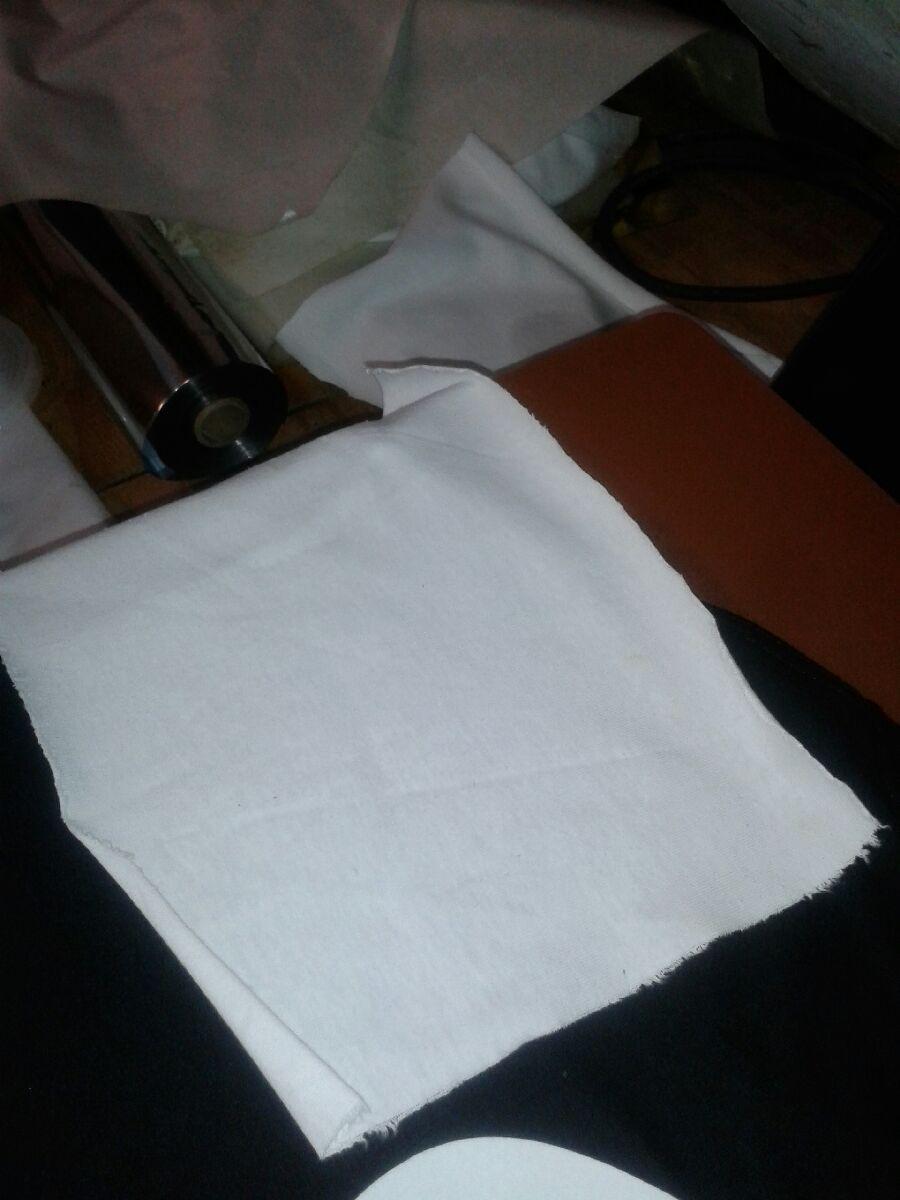
- Lay a piece of white cloth or pellon on top of the plasticizer.
- Heat press (with your fully warmed up heat press) the white fabric on top of the fabric you are testing. Do it at 320 F (160 C) for 30 seconds.
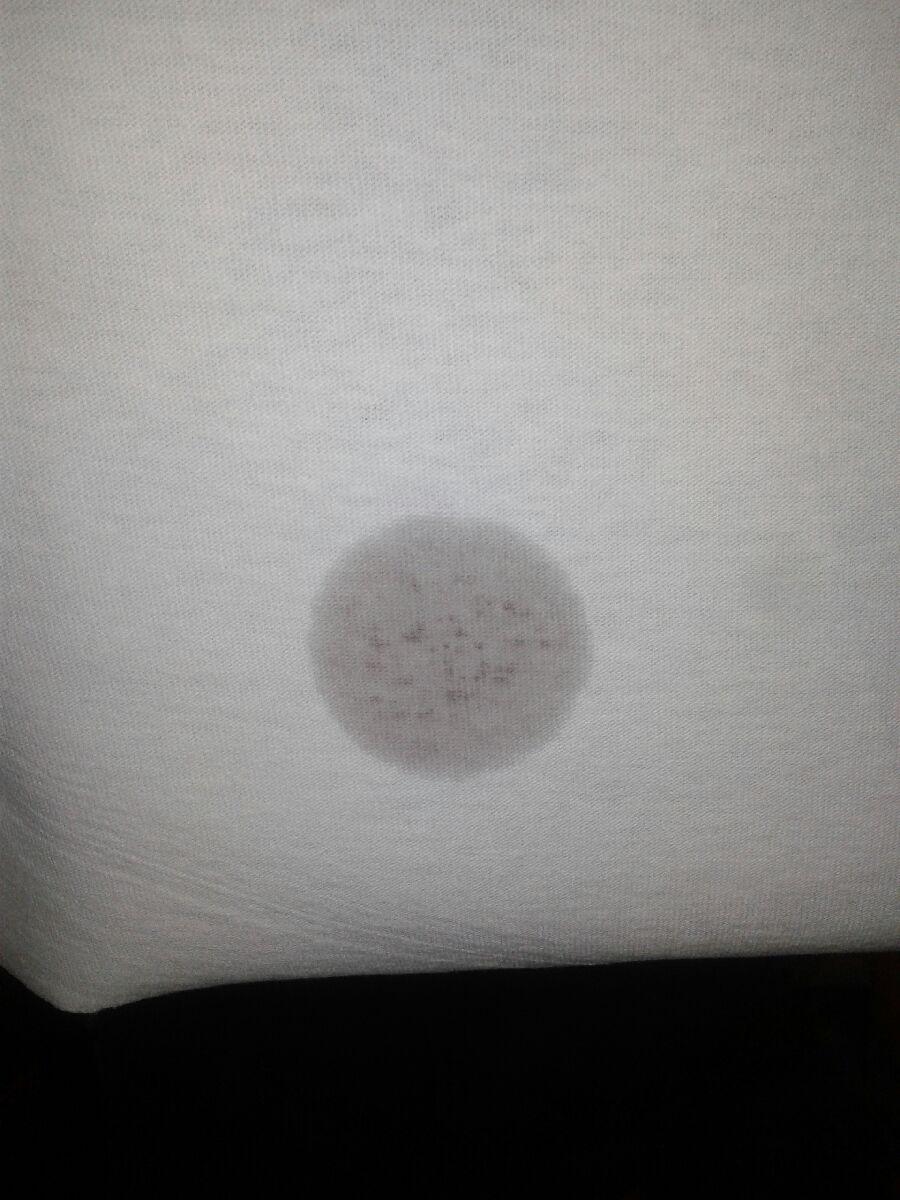
- Check the white fabric. What does that stain look like from where it was on top of the plasticizer? The more stain present on the white fabric the more severe the dye migration you will get when you try to print that fabric.
- Nearly alll polyester dye colors will migrate at least a little bit, this test just lets you know how severe the dye migration is going to be.
- Test some fabrics you have printed before. Since there is always at least a tiny bit of migration, you need to get a feeling for how much stain is indication of how bad the migration is going to be. If you do this testing often enough and see how things then print, you eventually get a very good idea of how badly any particular fabric is going to have a dye migration problem and you can take the appropriate measures.


What about dye migration which shows say couple weeks/month(s) later? How do you test that?
short answer: this is the test for that.
longer answer: I usually define bleeding as when the dye goes into the ink and you can immediately see it. Migration is what you describe, a slow painful process that might take weeks to show up and may not completely occur for as long as a year! The dye migration test is the best way to see what will happen in the few weeks you describe. The other is to print with the ink you will be using and then put the test garments in a box on top of your dryer for a couple of days. The heat of the dryer will accelerate the process and you will see what would normally take a few weeks to happen.
Great read and process to adapt for my shop. Thank you!!